Today is a quick tech lesson. We’re going to add a blog page to your existing WordPress website in just 5 minutes.
Here is the 4-step process:
- Add a new page
- Name and publish your new blog page
- Adjust your page settings
- Make sure your new blog page is listed in your website menu
I’ll provide screenshots from one of my own WordPress accounts so you’ll have pictures to follow along the way. Don’t worry if your WordPress menu options or Dashboard look a little different from my screenshots. WordPress is known for its flexibility, so all accounts will have different menu and toolbar options. You should still be able to follow the process through my screenshots just fine.
No time to waste! Let’s jump right in.
Step 1: Add a new page
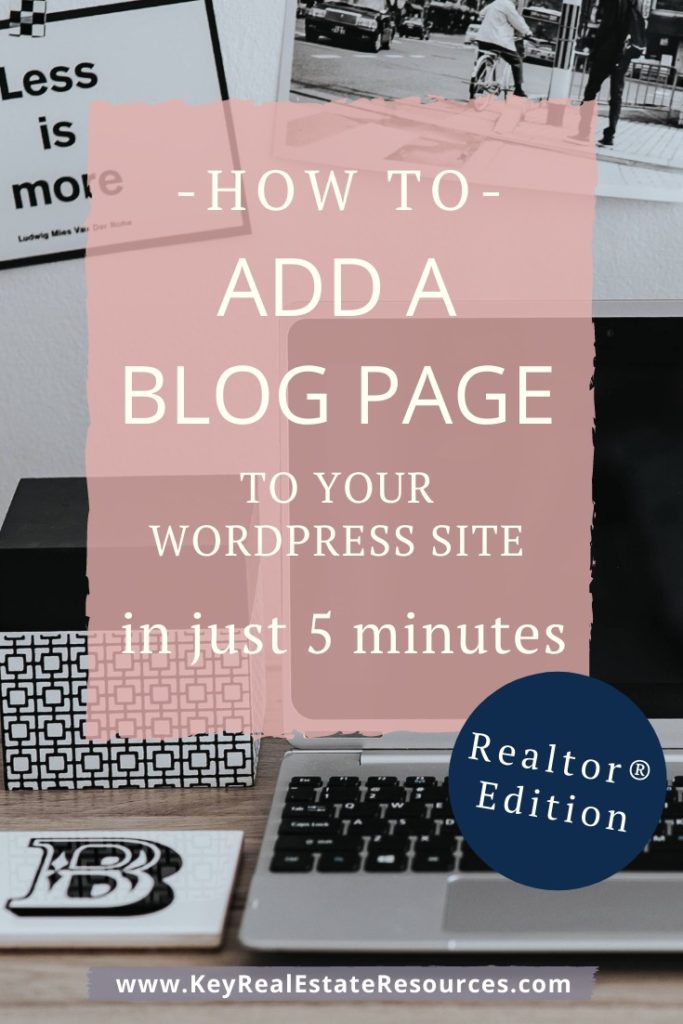
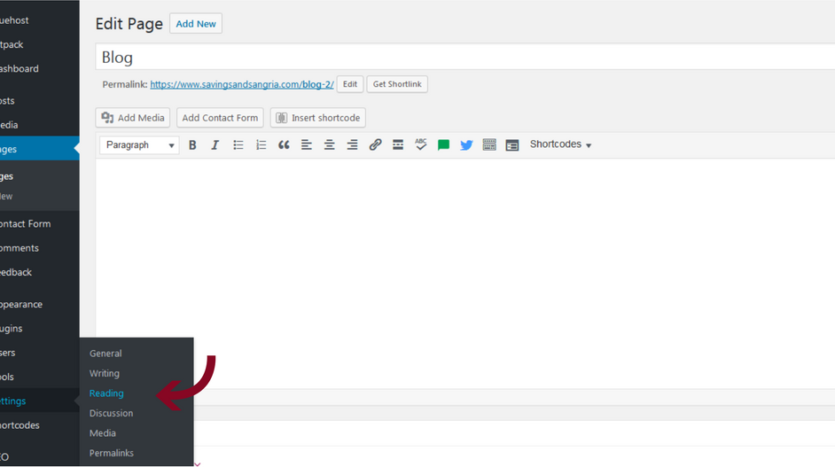
Once you’re logged in to your WordPress account, select “Pages”, then “Add New” from the navigation bar on the left-hand side.

Step 2: Name and publish your new blog page
Name the new page. I recommend sticking with the classic “Blog”, but I have seen Realtor’s name their blog page “News”, “Tips”, or “Articles”.

Click “Publish” to make your new blog page active.
Step 3: Adjust your page settings
Navigate to the settings menu by selecting “Settings”, then “Reading” from the navigation toolbar on the left-hand side.
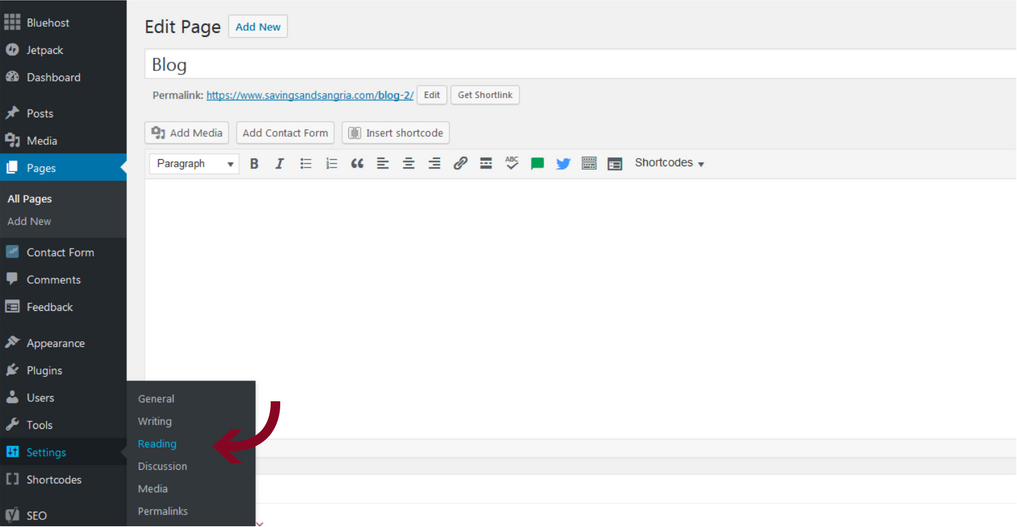
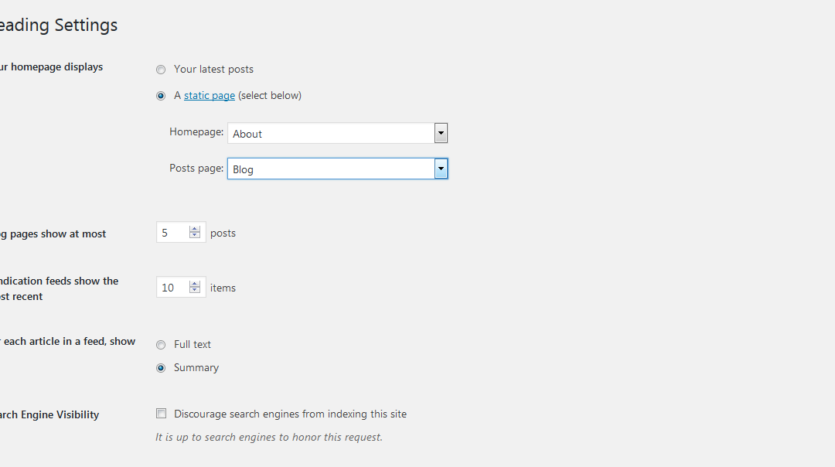
That will take you to a page that looks like this:
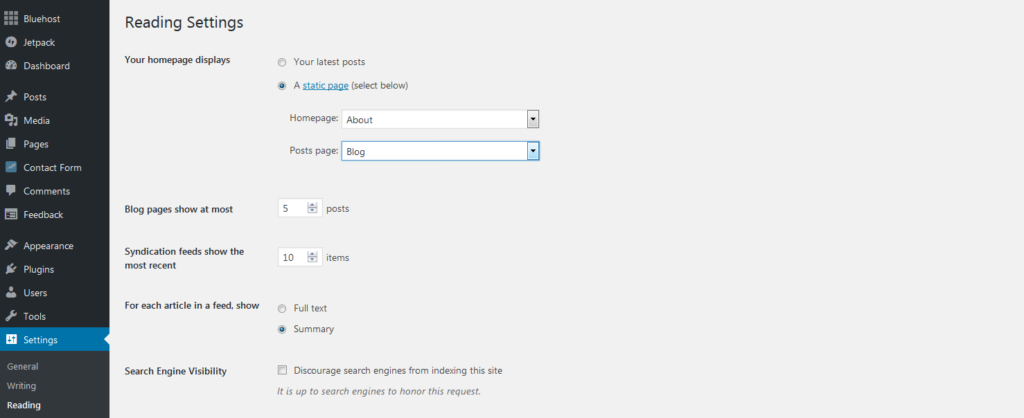
Here are the settings I recommend:
Your homepage displays
- Check “A static page” so your viewers continue to be directed to your main homepage when they enter your site.
- Homepage: Make sure your homepage (main page) is selected from the drop-down menu.
- Posts page: Select your new Blog page
Blog pages show at most
- I like 5 or 10 posts per page. This is just the number of most recent posts that will be displayed on your Blog page.
Syndication feed shows the most recent
- 10 items. This relates to your RSS feed, and designates how many posts will be sent out at once. If you’re not familiar with RSS, don’t worry. Just set this to 10 and move on.
For each article in feed, show
- Summary. This keeps your blog page clean. Using full text is overwhelming to the reader.
Search Engine Visibility
- Do NOT check this box. You want search engines to be able to find your content and direct people to your site.
Click “Save” at the bottom of the screen.
Step 4: Make sure your new blog page is listed on your website menu
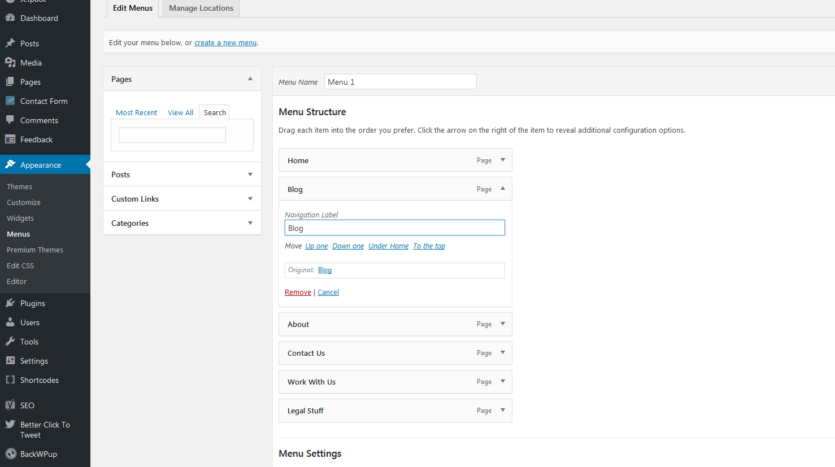
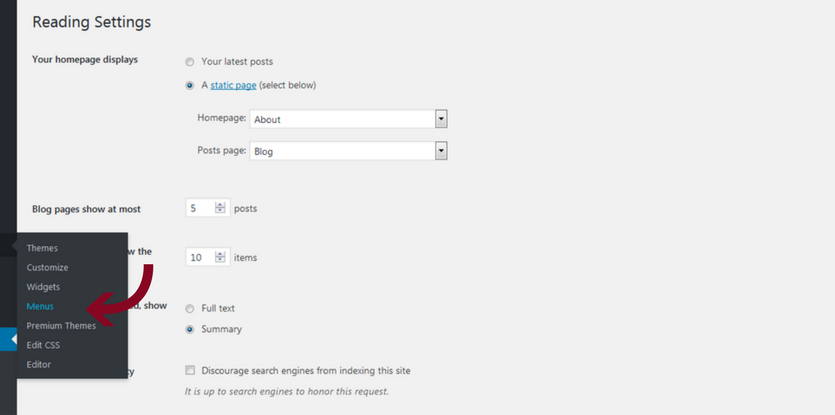
Navigate to your menus options by selecting “Appearance”, then “Menus” from the navigation bar on the left-hand side.
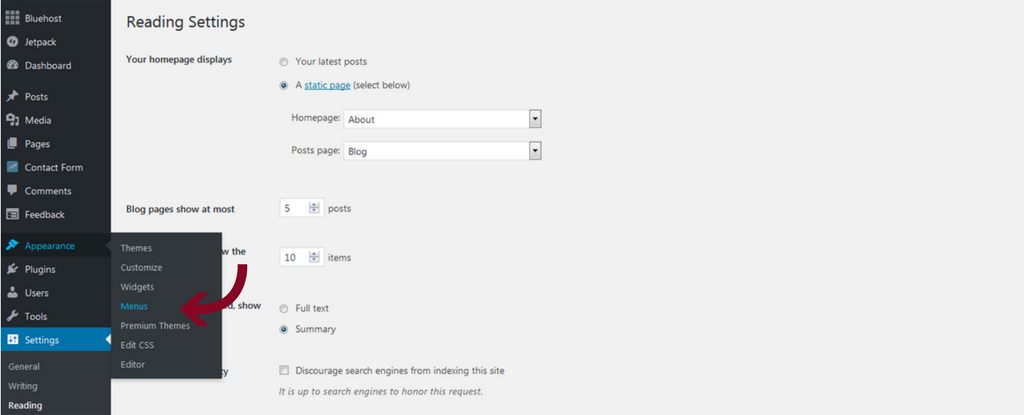
Your menu page may look different from mine based on your WordPress site’s theme/design. But you just want to confirm that your Blog page is listed in the Main Menu.
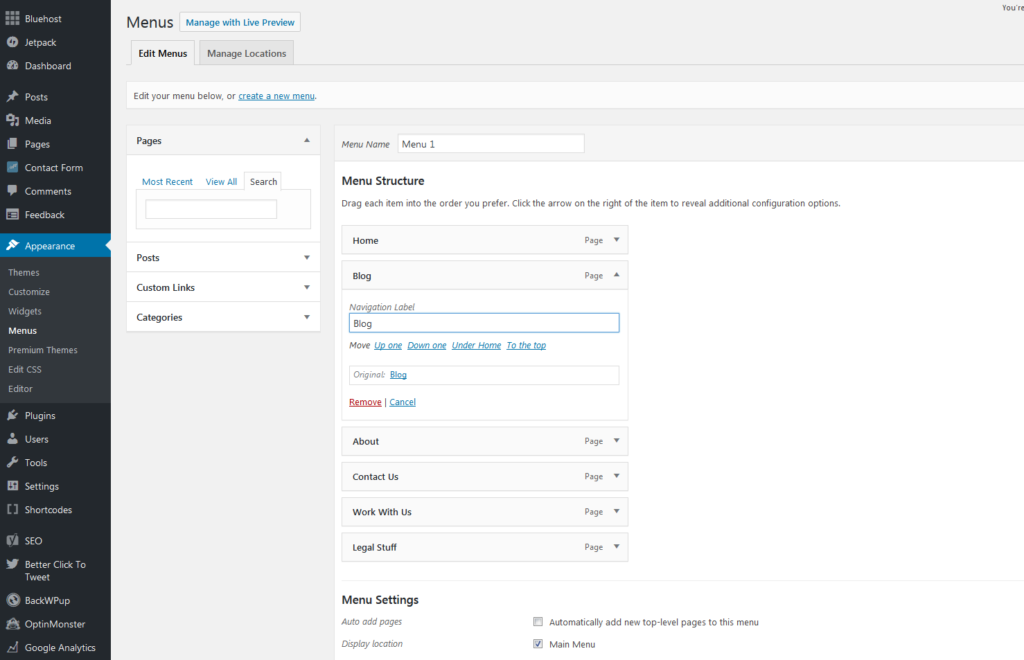
If it’s not listed, look for a button to add a menu item, and add your Blog page to the main menu.
Done! Your blog page has been added.
You can now add blog posts any time you like by clicking “Add New” under “Posts” on your WordPress sidebar.
Get A Quick Win
Now that your blog page is up and running, you can write your first post. And I can guide you through that too! Here’s a post all about How to Crush Your First Blog Post.
If you need some ideas for your future blog posts, I have plenty of them for you. Just enter your name and email below to have a list of 100+ Blog Topics for Realtors® delivered to your inbox.







Great blog post. I enjoyed the way in which you broke down and explained the different methods of making an income generating blog.
Thanks so much, Mau! I love sharing the secrets of how to make money with your real estate blog. Especially since savvy real estate agents are already blogging to increase their SEO and generate leads anyway 🙂